- 1 All in one HTML layout file with inlined css and with template tags for mailchimp,campaignmonitor and stampready
- Full Sliced PSD.
-
1
Starting:
A. Open builder.html in your web browser - Click here to open now
B. Use drag and drop to add modules,change colors,icons & upload images
NOTE: Images and text can also be changed later,in Mailchimp,Campaignmonitor & Stampready after download -
2
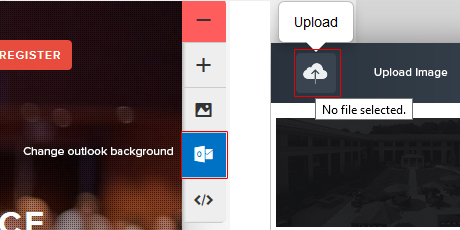
Change/Upload Background image for outlook and other email clients online
Upload background image for Outlook
- Choose your images for top banner and for venue background.
- Use fixed size image 620px X 620px.In outlook email will be resized to 620px fixed width.
- Use inbuilt image uploader for uploading your images OR you can paste absolute url of image (for eg http://www.mysite/images/myimage.jpg) if you host your images at your server.
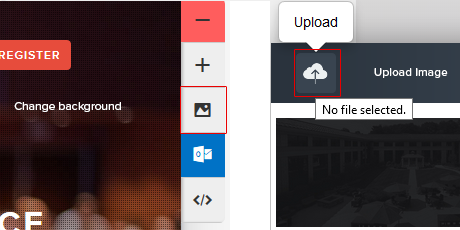
Upload background image for other email clients & large screen devices
- Choose your images for top banner and for venue background.
- Use large size image 1200px X 600px or above.This image will be used for other email clients and large screens.
- Use inbuilt image uploader for uploading your images OR you can paste absolute url of image (for eg http://www.mysite/images/myimage.jpg) if you host your images at your server.
-
3
Editing Time countdown & Using Motionmail Service
A. Visit motiomail to create free timer
C .Replace time.gif with link from motionmail
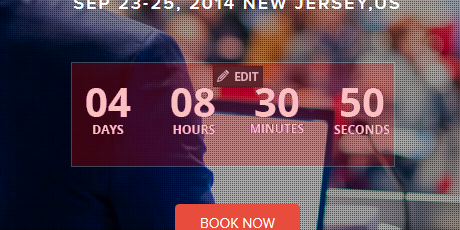
Making transparent gif as in demo
visit following linkhttp://designgear.in/timer/timezone.php
-
4
Preparing images Using PSD File
You will find all images for respective template in images folder in that template.If you use Photoshop to edit your images, you will find full sliced PSD- Placeholder elements for inserting images are made using smart objects just double click to insert your image and save to update.
- After editing and deleting, you may want to export the resulting images. Go to File > Save for Web (or corresponding) or press Alt+Shift+Ctrl+S, make the adjustment and proceed.
Replacing images later in mailchimp or campaignmonitor
Note: you can replace images later also in mailchimp or campaignmonitor.
-
5
Minify code to avoid clipping in gmail
Builder will automatically minify your code on download.
This will be your final code ,you can upload it to mailchimp , campaignmonitor or stampready using steps below.
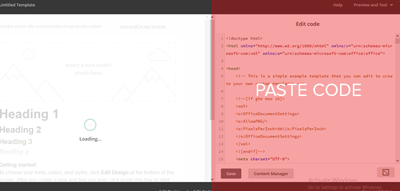
- Open Zip downloaded -> Template folder -> index.html -> Open with notepad++ OR any text editor.
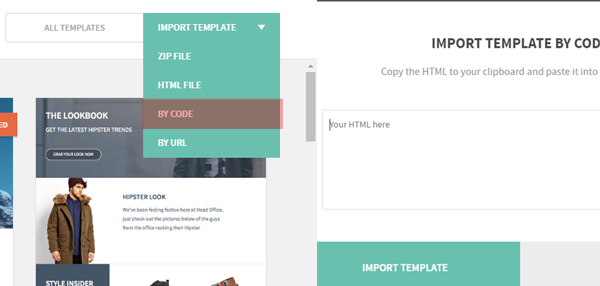
- Select all - > copy all code
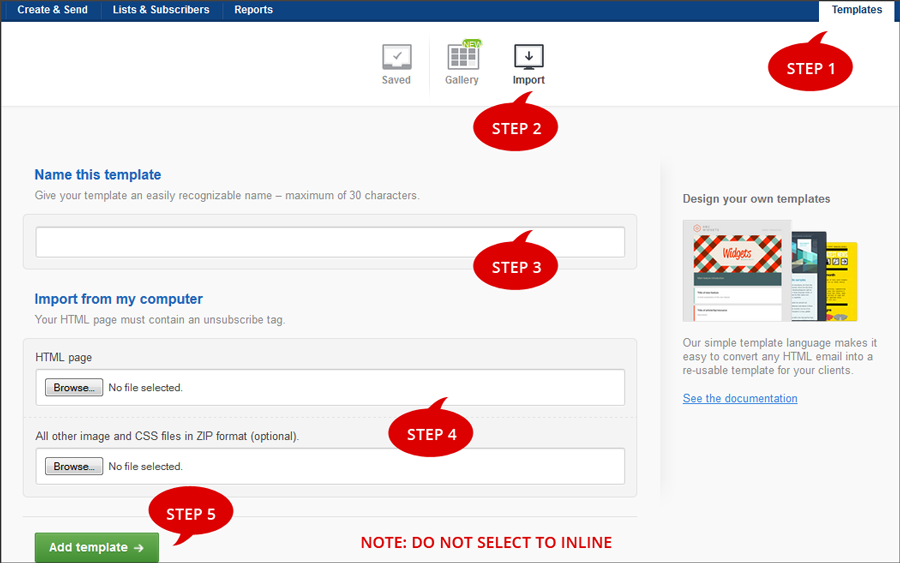
- Staring in your dashboard, click on Templates.
- Save and exit
 |
 |
- Create Campaign
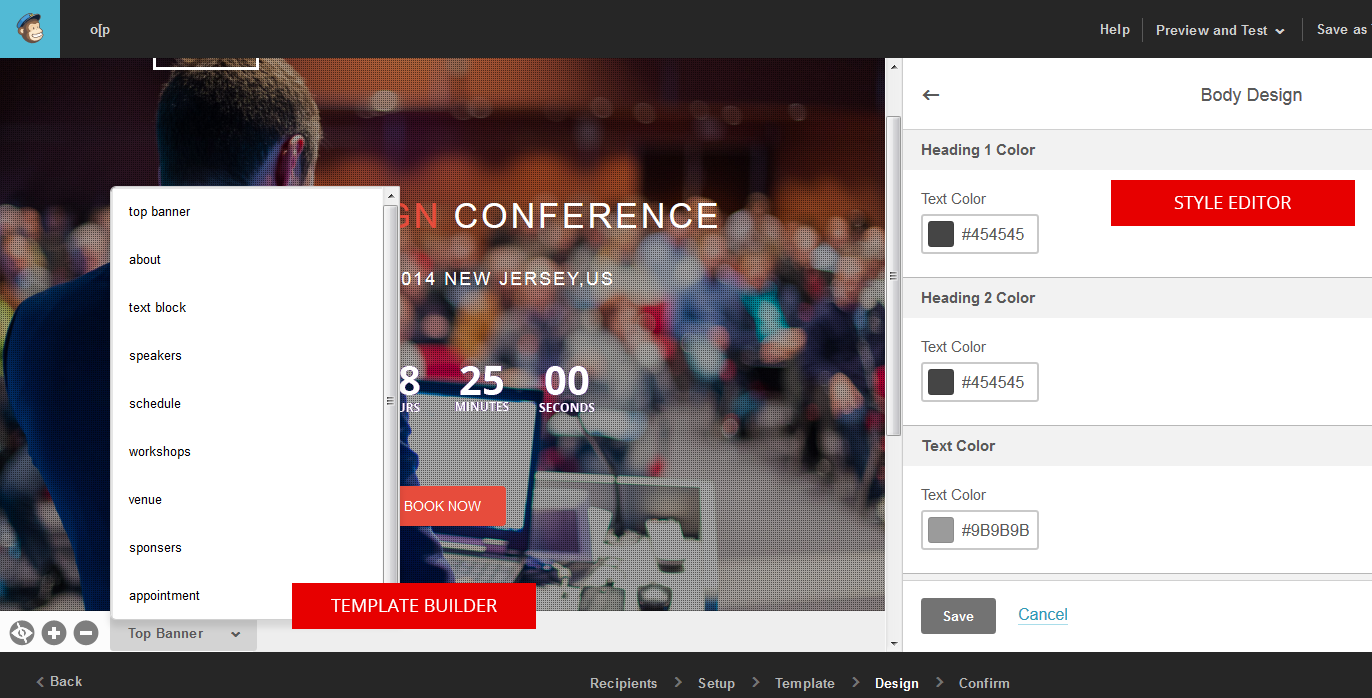
- Select a Template->Saved Templates->Select
- Edit styles
- Proceed further steps for sending
- Open Zip downloaded -> Template folder -> index.html -> Open with notepad++ OR any text editor.
- Copy All Code
Paste your code & click import template
After successful import you can drop modules from left menu to built your layout
- Open Zip downloaded -> Template folder -> index.html
- Click Create and Send from top menu
- Create Campaign
- Choose Saved Template(do not inline css)
- Use template builder